
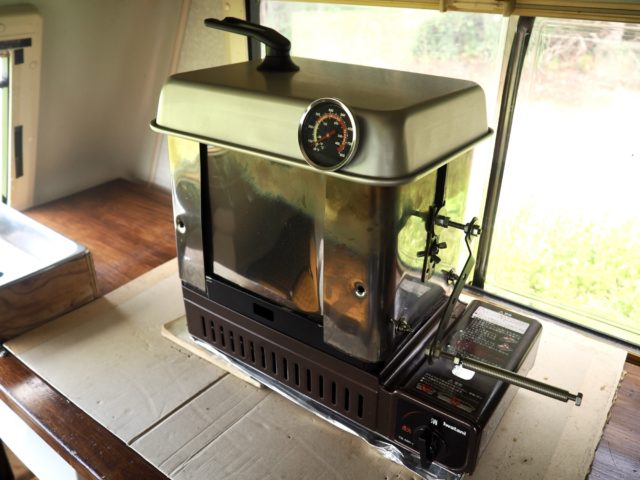
About Kuroneko Coffee Roastery’s Roasting Machine
Here are the basic specs of our homemade roasting machine.
Heat source: Direct flame / gas (Iwatani cassette stove)
Roasting method: Manual hand-cranked
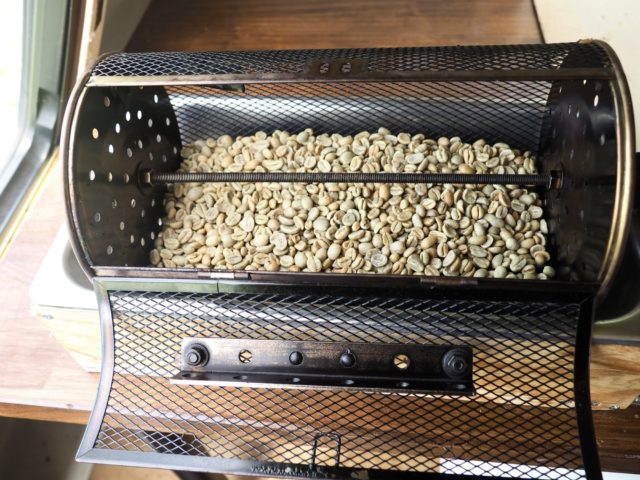
Max green bean capacity: 800g
While I do have a general roasting profile I aim for, the machine is highly affected by ambient temperature, so in reality, roasting often relies on intuition and experience—a true artisan approach.
Though technically capable of handling up to 1kg of beans, I limit batches to 800g to avoid uneven roasts and a higher percentage of defective beans.
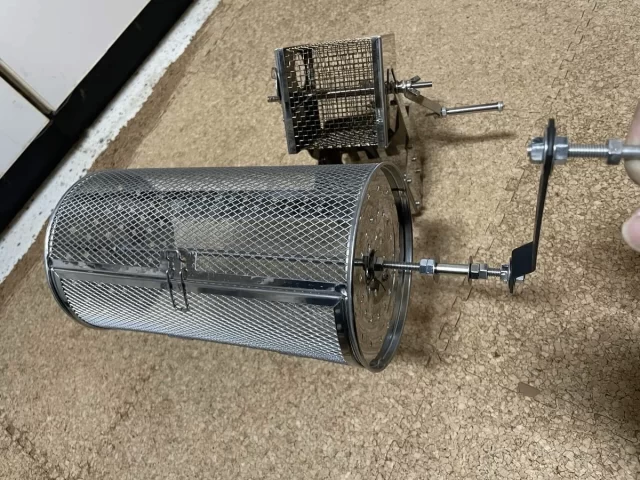
The materials were mostly sourced from local home improvement stores and Daiso.
The only exception is the rotating drum (basket), which I ordered from Amazon.
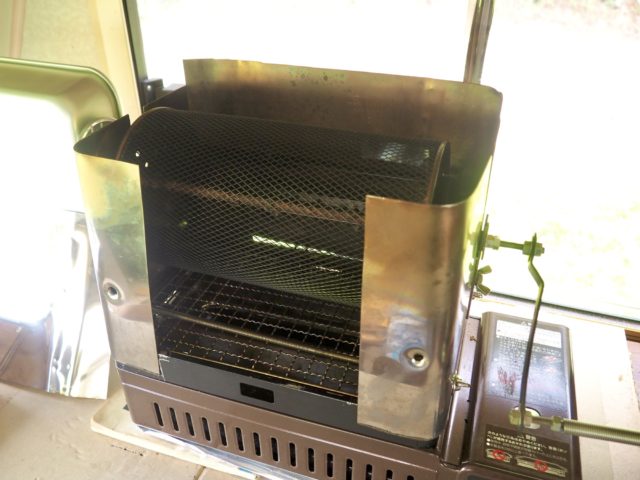
What Roasting Looks Like
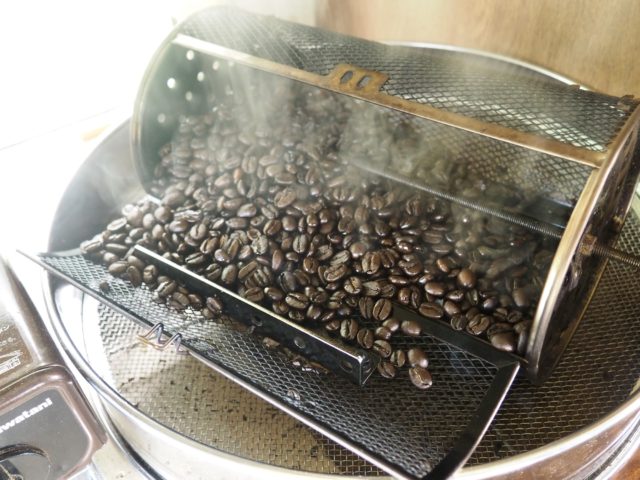

Despite being DIY, the roaster performs surprisingly well.
That said, since it’s a direct-fire setup, the chaff often catches fire during roasting, resulting in a subtle smokiness.
Depending on your perspective, this could be:
- a delightful aromatic character, or
- an unpleasant burnt smell.
Your interpretation will likely determine the occasions when this coffee suits your taste best.
Why I Built My Own Roaster
I started off with a small square direct-fire roaster from Amazon, roasting about 100g at a time for personal use.
Naturally, that setup was far from adequate for commercial use—both in capacity and consistency. Achieving the same roast level repeatedly proved extremely difficult.
So I looked into commercially available roasting machines.
Unfortunately, most were too expensive, and many couldn’t be installed due to heat source restrictions.
Eventually, I thought, “Why not just build one?”—and dove into DIY, relying on YouTube and blogs for guidance.
I bought a cylindrical drum, added internal paddles for agitation, built a shaft with threaded rods, secured it with double nuts, and attached a handle.
I cut and bent stainless steel sheets for structure and reinforcement, and after many modifications, the machine evolved into its current form.
The heat source is a long-body cassette stove, and I enclosed the entire unit in stainless steel for better heat efficiency, safety, and to reduce chaff scatter.
After roasting around 10kg in test batches, I finally reached a point where I could consistently hit my target roast levels.
As expected, winter is brutal. When temperatures drop below freezing (often well below -20°C), the roaster and the entire workspace fail to heat up properly, making consistent quality nearly impossible.
This was something I anticipated, and experiencing it firsthand confirmed that I need to pause operations during colder months.
To meet food safety regulations, I also completed an e-learning course to become a certified food hygiene supervisor and registered with the local health office.
This officially established Kuroneko Coffee Roastery and allowed me to begin online sales.
Looking Ahead
I won’t lie—I’d love a Fuji Royal sample roaster, or one of those high-tech AI-controlled machines.
But realistically, given that this is a side business, the costs just don’t make sense right now. Plus, I’ve already built something that works well in the manual, direct-fire style I love—so I plan to stick with it.
I did experiment with motorizing the roaster using a power drill, aiming for a semi-automated system.
But the results were a flop:
- If the rotation speed was too high, the beans stuck to the drum walls due to centrifugal force and burned.
- If too slow, they didn’t mix well enough—again leading to burnt beans.
The sweet spot seems to require manual adjustment by feel, which is hard to automate.
That said, if I can figure out how to motorize it properly, it could allow for larger batches and better efficiency—potentially lowering costs and stabilizing prices. So I’ll keep experimenting.
Whenever “Roaster v2” is finished, I’ll be sure to share the update. Stay tuned!